If you’re a Python developer and found yourself creating multiple Python projects, you would probably benefit from having different Python environments. By installing Anaconda on your Windows or Linux machines, you can create different Python environments, each with a different Python version and separate dependencies!
In this post, we look at how to install Anaconda through Miniconda, a lighter Anaconda installation. This will allow you to manage all your different Python environments with the terminal!
Video – Installing Anaconda / Miniconda On Windows & Linux
The video below shows every step needed to install Anaconda on Windows and Linux. Ideally, you should watch the video and refer to the rest of this post for more information and the commands used!
Installing Anaconda On Windows
Installing Anaconda on Windows couldn’t be easier.
Essentially, download the Microsoft Windows Miniconda installer, and make sure you select the correct architecture for your machine (either 32-bit or 64-bit). If you don’t know, it’s probably the 64-bit version.
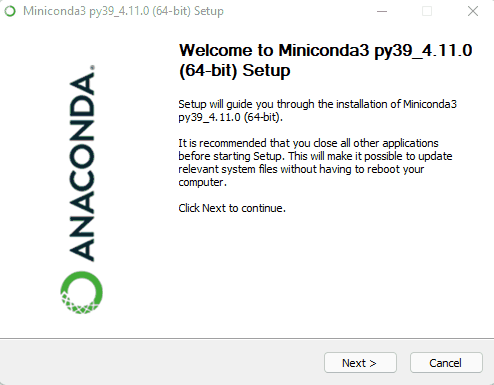
Once downloaded, simply run the installer, and accept the terms and conditions. When prompted, I don’t recommend changing the installation directory unless you have a reason to.
That’s it, after the installer is done, you should have Anaconda installed. In fact, you can use Anaconda through the command-line tools added to your Windows:
- Anaconda Command-Line: This tool is the equivalent to Windows’
cmd, with the extracondatools added to it so you can use them in commands. - Anaconda Powershell: The equivalent to Windows’ Powershell. Also has
condaadded to it, so you can call the tool in commands. I’d recommend using this version as it’s a more up-to-date terminal for Windows, with better commands.
Unsurprisingly, you can find both of these tools by typing “Anaconda” on the Windows search bar.

Adding To Conda And Python To The Environment PATH Variable
If you would like to use the conda tool in Window’s command-line (cmd) or Powershell, you need to add a couple of directories to your environment PATH variable:
- For the Anaconda tools, you need to add the
condaexecutable. - To use the Anaconda-managed Python, you will need to add your environment’s Python directory as well.
To get the conda directory, open the Anaconda Powershell, then type the following.
(Get-Command conda.exe).SourceThis will result in something like Some-Path-To\miniconda3\Scripts\conda.exe. You should add Some-Path-To\miniconda3\Scripts to the PATH. In other words, we don’t add the conda.exe bit!
Furthermore, to add the Python directory, you need to activate the environment you want, then find out the Python directory. For example, run the following from Anaconda Powershell.
conda activate my_env
(Get-Command python.exe).Source
Unsurprisingly, the above will give you the directory and path to my_env‘s python.exe. Simply the directory (without the python.exebit) and put it in your PATH.
Note On Adding Conda & Python To Environment Variables
You probably noticed that we’re only adding the Python directory for a specific environment. Essentially, this only lets you work on one environment at a time by default. However, you can always change the PATH values to change your default Python executable. Or you could do a conda activate SOME_OTHER_ENV to switch.
There is an alternative to adding the Python directory: you could just add the conda.exe directory to the PATH variable, open a new Powershell session, and type conda init. However, this will completely replace your Windows Python installation PATH (if you had one before Anaconda) with Anaconda’s default Python. Use it at your own risk!
Installing Anaconda On Linux
Although it’s a little bit more manual than the Windows installation, it’s also quite easy to install Anaconda with the Miniconda Linux script.
Firstly, copy the link to the correct Miniconda install script. If you don’t know which one is right for you, it’s probably the Miniconda 64-bit Linux one. If you’re using a different architecture, I assume you know who you are 😉
Run the following commands in your terminal, preferably from your home directory.
mkdir miniconda-temp && cd miniconda-temp
wget https://repo.anaconda.com/miniconda/Miniconda3-latest-Linux-x86_64.sh
chmod +x Miniconda3-latest-Linux-x86_64.sh
./Miniconda3-latest-Linux-x86_64.sh
Although I provided the link to Miniconda3-latest-Linux-x86_64.sh above, keep an eye out for changes in the version. At the time of writing, the Miniconda version is at 3, but it’s best to copy the link to the latest script and paste it into the commands above.
All you have to do now is keep pressing enter, read the terms and conditions, and agree to it by typing “yes”. Again, the script will prompt you whether you want to change the installation directory but don’t do it unless you have a good reason to.
Finally, when the script asks you if you want to initialise Anaconda, type “yes”. This will add the conda tool to your PATH, so you can use it in the terminal.
Copying The Conda Initialisation Code To Your .{bash,zsh,ksh}rc
After the installation, you should be able to run the command conda --version. If that’s not the case, then this section is for you.
If you agreed to let conda initialise in your shell, then it should have added some initialisation scripts to your “rc” file. Specifically, it will add something like the following code block to it.
# >>> conda initialize >>>
# !! Contents within this block are managed by 'conda init' !!
__conda_setup="$('/home/matheus/miniconda3/bin/conda' 'shell.zsh' 'hook' 2> /dev/null)"
if [ $? -eq 0 ]; then
    eval "$__conda_setup"
else
    if [ -f "/home/matheus/miniconda3/etc/profile.d/conda.sh" ]; then
        . "/home/matheus/miniconda3/etc/profile.d/conda.sh"
    else
        export PATH="/home/matheus/miniconda3/bin:$PATH"
    fi
fi
unset __conda_setup
# <<< conda initialize <<<
Obviously, if you’re using bash, this will be added to your ~/.bashrc file. Likewise, it will be added to ~/.zshrc if you’re using ZSH.
The problem comes when you’re not using a shell that Miniconda’s initialisation supports. For example, until recently, I had to manually copy the contents of the initialisation block from ~/.bashrc to ~/.zshrc. In addition, I also had to make a few changes so the bash code worked in ZSH.
This is what you might need to do! I assume that, if you’re using an obscure shell, you’re probably skilled enough to convert the bash code to your shell’s liking.
Useful Anaconda Commands For Beginners
I know this is just an installation tutorial, but I decided to show you a few commands that are definitely useful to know!
Creating a new Python environment called NAME with a particular Python version VERSION:
conda create --name MY_NAME python=VERSIONDeleting the conda environment called NAME:
conda env remove -n NAMEUsing the environment called NAME, also known as activation/deactivating:
# Activating the env
conda activate NAME

# Disabling the current env
conda deactivate
Installing dependencies (packages) to the currently active environment. Make sure you’re in the environment you intended to be. Interestingly, you can either install with conda itself or pip:
# using conda
conda install CONDA_PKG_NAME
# using pip
pip install PIP_PKG_NAME
List all installed packages on the currently active environment:
conda listList all packages available in conda:
conda searchDid I miss anything? Did you spot a mistake? Anything not working for you? Do you have feedback or questions? Feel free to comment below and I’ll get back to you ASAP!
Be First to Comment